
|
I started building trunks over 22 years ago. My wife needed a larger more sturdy constructed trunk to replace her cheap foot locker. The first was a basic box trunk with a sliding drawer design from some magazine. Since than I have redesigned the Basic Trunk with new design improvements. I have built and sold a few on consignment for a tack store, and built Tack Cabinets for my wife and her friends, to fulfill their equestrian needs.
Some were covered with a plastic Laminate (Formica), others painted, all stained and satin polyurethane inside. Each Cabinet or Trunk is slightly different than the other, and changed designs for rides preferences. Some of the cabinets and trunks pictures below were built by me, others have been made from my plans and purchasers have kindly shared their Trunk pictures with me.
|
 A Place to Put Stuff by Jennifer Williams, Ph.D. Excerpt from September 2007 article on tack equipment. |
Locker Designs If you have the skills to build your own lockers but aren’t sure how to create the design, well you can purchase tack locker designs on-line. Elite Tack Design (www.elitetackdesign.com) offers several different tack locker plans. Bill Tschorn of Elite Tack Design started designing tack trunks and lockers over 20 years ago when his wife needed a place to store her tack. They now offer different plans that cost $42 each and include a list of needed materials and tools, plywood layout sheets to help you cut the plywood, and illustrated step-by-step instructions. Tschorn, who is a technical illustrator, drafter and graphics artist by trade, says, “I have carefully designed and illustrated each manual for the average home carpenter. This allows people to construct the cabinet with their own personal touch.“ |

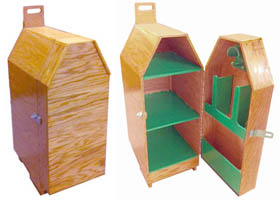
I've been looking out for a reasonably priced used tack trunk for awhile now with no luck.
(Nice new ones are SO expensive!) My grandfather built me the most awesome trunk based
on your "Basic Tack Plus" design for my birthday/Christmas this year. I thought I'd share some pictures
of the finished product. Everyone at the barn is completely jealous! I'm ecstatic and can't wait for show
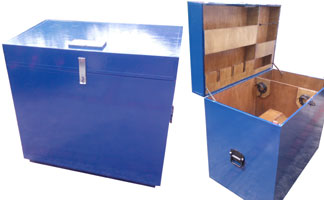
season to start to show it off!! Made out of oak plywood, with tin roofing material for the outside.
Built by Don Cogzill. Thanks a million for a great product! Janel Essman
 |
My dad built this for my daughter Sarah Lipps and I put the finish on. We used bigger wheels because we go to lots of shows and sometimes have to walk quite a ways. I have a brass tag on order with her and Redd's name for the front. Your plans were right on the mark with exact details that made building a breeze. Now we have 2 other Go & Show Caddys, we are finishing for our younger 2. Thanks Henry Lipps. |
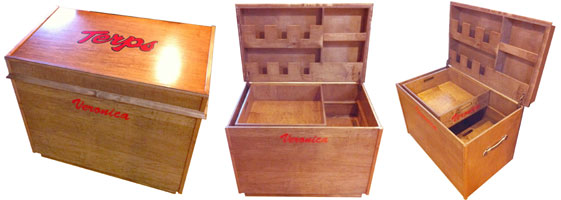
Hi: I just wanted to show off my project. I used your design (Basic Tack Trunk) and it proved to be
extremely helpful. The trunk was a Christmas gift for my girlfriend who attended University of Maryland
and rode on their equestrian team. I loved building it and the gift meant a lot to Veronica.
Happy holidays! - Dale Springer

Hello: My name is Haley Thomson and I'm in Ontario, Canada. I ordered your plans after drooling
over your website for almost two years and was pleasantly surprised at their precise measurements
and how they took you through the entire process step by step so that even someone inexperienced
in woodworking could handle making this box.I also was very appreciative of the materials I was told
to use because it makes the box light but durable. I did make some small additions in that I used 3"
castors instead of 2" inch because I will be taking this box to shows with me and need it to roll on
grass easily, I added the corner edging for more rigidity and strength, and I added a little hatch door
over the mall storage space in the lid in order to keep all of my braiding tools and hoof polish in when
you again when I get my own stable. I'll need a full locker at that point!
Hugs and Happy New Year, Haley and Forest!

Hi Bill: Your plans helped me to make a far better box than I could have on my own.
The wood is all furniture grade red oak, with ML Campbell Conversion varnish as a finish. All the
hardware bolts and name plates are 100% stainless. Only thing I would change if I made another one
would be, use 3/4" plywood rather than 1/2". I would highly recommend buying and using your plans,
as just material savings paid for plan cost. Thanks - Scott Baker
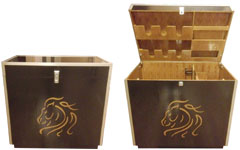 |
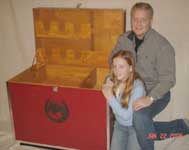
Hi There: Though you might like some photos of our Basic Tack Plus. My boyfriend and Brother in law built it for me. We asked how did they do the horse logo on the trunk ? The logo is my logo for my photography business and I took the logo and got it made into a vinyl sticker, and that's how its done! Glad you like it, I think it looks fantastic! Carrie Wagner |
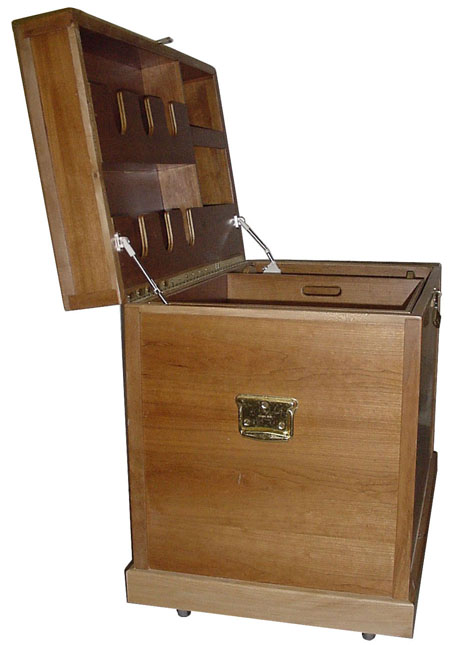 |
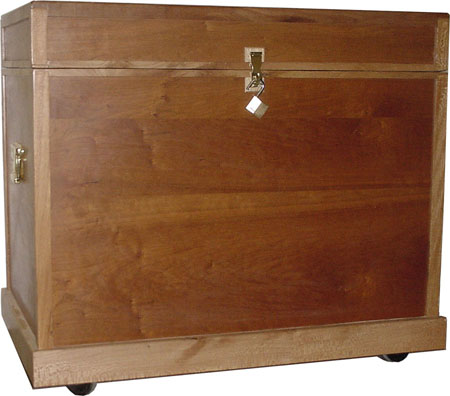 Lauren's Trunk (Shown) |
 |
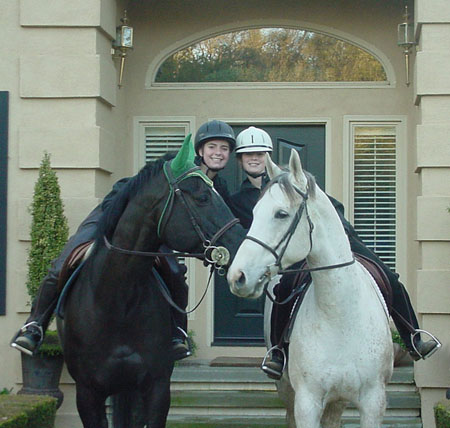
Lauren & Elizabeth |
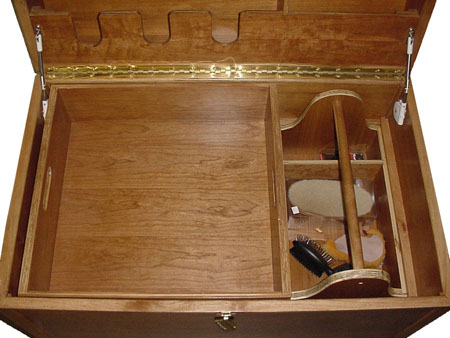
He used Cherry Veneer Plywood and modified the Elite Tack Design plans to include tongue
& groove joints. The four corner posts and trim are made from Quarter-sawn Sycamore.
Larry also made a brush-tote tray that fits on top of the interior hatch lid next to the sliding drawer.

 |
Hello: I thought I would send you some pictures of the box I just finished for my daughter from one of your plans. I modified it to have a pullout saddle rack. I also changed the size of the lower compartments to allow for the lowest shelf to hold a large water bucket. The top shelf on the door was not cut out for polos but left to hold bell boots. - Nathan Onfrichuk, Ottawa, Ontario, Canada |
 |
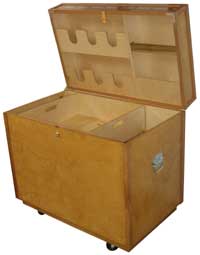
Hi Bill, My daughter Kelsey and I built her tack box from your plans. We used birch plywood and painted it. The materials were a Christmas present (from me and her mom) and together we constructed it. We had a blast and she loves it. It turned out great and is the envy of the barn. - Peter VanderMeer |
 |
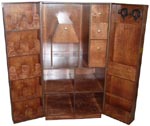
Bill: I found the handles; they were buried in a corner of the hardware section at Lowes. Thought you might like these pictures. The trunk is currently sitting on a small mover's dolly tipped under it for ease of movement. I used Baltic birch laminate for the box. The base is yellow poplar. I happen to like the natural 'green' color of yellow poplar so you will see it used throughout. I even trimmed the hatch door edge with it to clean up the edge of the laminate. The upper drawer rails are red oak, as is the trim on the upper edges of the laminate for the box, and the corner trim. The face piece inlay on the top is a maple-walnut-alder-birch pattern. I stained it with a wipe on Honey Maple stain from General Finishes, and used General's Arm-R-Seal wipe-on spar urethane to finish it. Both the trunk and the tack armoire came out to my wife's liking. Cheer! - Don Hooper |
 |
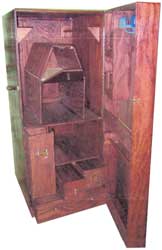
Hi Bill: Just wanted to share with you some pictures of the tack cabinet we made from your plans. My daughter has been asking for something like this for a long time, and I wasn't able to find anything (that I could afford) that would suit her purposes, until I found your plans. It turned out really nice and I wanted to share the pictures. My husband made it and he is such a perfectionist! We kept telling him it's going in a barn, but he went all out anyway. We gave it to my daughter for her 25th birthday and she really likes it, as do everyone else in the barn. Of course they all ride western, so it wouldn't work for them! Hope you enjoy the pictures! - Judy Keener |
 |
Dear Bill I thought that I would send you some pictures of the Tack Cabinet I made for my girlfriend, Ransom Witt, for her birthday ... she had some modifications that she wanted, so I used your Total Tack Cabinet template and made the changes accordingly ... Your designs were very helpful and I know that she will love this ... thanks again. Sincerely - Mickey Loftis |
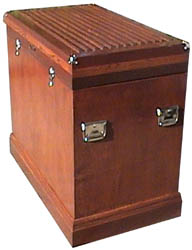 |
Hi Bill: Thanks for thecompliments of my work. I am a tenant in Maureen's apartment building and she knows I'm a skilled cabinet maker. So any time she, needs one of a kind masterpiece she calls me. I have built some incredible things for her over the past 8 years that in the normal world would have paid very well. I am just a poor carpenter, who loves woodworking so much, that even if I had millions, I would be in my wood workshop everyday! Since I don't have any work space where I live, most of the trunk was built in my driveway, on saw horses, and concrete ground. Near the end we used Maureen mother's garage to stain, varnish, paint and final assembly. It was also a good place to hide the trunk from Rebecca till Christmas. I got the hardware from ROCKLER.com. Maureen did reimburse me for the hardware, paint, varnish, brushes, sandpaper etc. The wood was free, leftover from my real job projects. It was truly a labor of love, having built my first tack trunk! It wouldn't have been possible without you Bill. Thanks! - Marc Bonner |
 |
Hi: I recently purchased your plans for the Basic Trunk. We were building it for our daughter who shows steers in area fairs, she is a senior and we knew she would only use the box for 2 fairs so we put a little extra work into so when she travels to college she will take it and use it as a hope chest and storage. The plans were very easy to follow even by those with little carpentry skills. As you can see in the photos we added a few details, trim around lid and bottom, wheels and name plates for the animals Janna has shown. |
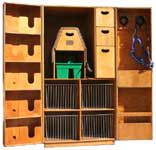 |
Hello there: I just wanted to write to thank you for your fantastic plans. My dad and I built your armoire tack cabinet as a father-daughter project, in honor of my first horse. We are SO pleased with how it turned out. Your plans were easy-to-follow and complete, and we couldn't believe how well everything fit together and how nicely designed the box was. Everyone is incredibly impressed and we are getting many compliments. I'm directing lots of people to your website! I've attached a couple of pictures of the finished box. It would be wonderful to see them on your website! Thanks again for your fantastic design. We couldn't be happier. Sincerely, Katie Taylor |
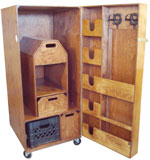 |
Hi! Wanted to share the pictures of my new Western Tack Cabinet built by a friend and co-worker from Lexington Fire Department (KY) Major Darryl Osborne with the help of FF David Gumm, FF Rick Faulkner and Darryl's son Darrin. The pictures do not do this cabinet justice- it is absolutely beautiful. I am using it to hold a saddle seat saddle and all my stuff at a boarding facility. Your plans were great and my friends did an incredible job-it is gorgeous and fits my needs perfectly! (It is too pretty to put in a barn!) - Carrie Bowling |
 |
Hello there! So I finally finished my tack box, I had ordered the plans from you, and I thought I would send you the final pictures... There's still some saw dust/little wood ships/dust in there (I just finished staining this afternoon!) but I absolutely love it! There a couple of modifications, or I suppose I can call one a "mishap", but nevertheless, it's awesome!!! My carpenter accidentally attached the trunk lid on the wrong side! But the difference is negligible, haha... Also we decided for the saddle house roof, instead of putting it on a hinge, we have it lifting out, because my bridle hook I guess was a little long, so it would've hit the hook, and plus it's actually pretty easy just to have it pulls out! I hope you like and that we did your plan justice! It was built here in Calgary by D. Parker Thanks again for all your help! - Heather Love |
 |
Dear Bill, I was delighted to receive your Christmas card last month and I have since then been meaning to drop you a line. In fact, I have been meaning to drop you a line since I completed the tack cabinet based on your plans almost a year ago. I have no woodwork training but I found the instructions very clear and easy to follow, and I had a lot of fun making it. My daughter Heather is delighted with the tack cabinet and it is the envy of all her friends. I cannot tell you how many people have admired it since we put it in the tack room at the stables where her pony lives. Certainly it stands out from the other tack boxes in terms of design and finish. In fact the admiration makes me feel somewhat guilty because whatever about the finish, credit for the design belongs to you. I had intended to give it a better paint job and had envisioned all kinds of colors and stenciling, but Heather in her impatience to take possession barely allowed me time to lash on a few coats of varnish! Regards, Frank Henry - ( Ireland) |
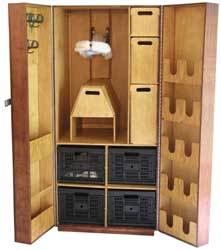 |
Hello Elite Tack Design: Your web site asks for finished photos of your completed designs. I've attached a photo of a variant of the "Armoire" that my husband built for me. I am an eventer so I have 2 saddles, 3 different bridles and more gear than most "one sport" participants. This version is 11" taller to accomodate the second saddle rack and the doors have been switched. It is stained and then poly-urethaned throughout. - thanks Judy Labovitz |
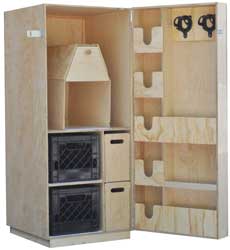 |
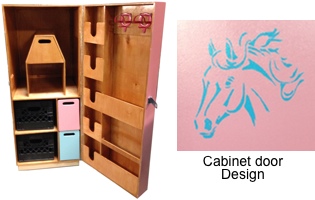
 Bill: We built ours just like your plans call for and finished with a coat of linseed oil. The oily linseed rag we used to apply finish to the cabinet caught our trash can on fire in the garage, but everyone is safe. The only thing we did different from your plans was to add a 1/8" sheet of plastic under the tack box area, the area the two milk crates sit and under the bottom drawer. You will see them in the photos. I thought that the plastic tack box and plastic milk crates would slide in and out smoother with plastic under them and it will also keep the wood from getting soiled. We also put parafin on the bottom of the two wooden drawers on the right side so the drawers slide in and out easier. Enjoy, David Bill: We built ours just like your plans call for and finished with a coat of linseed oil. The oily linseed rag we used to apply finish to the cabinet caught our trash can on fire in the garage, but everyone is safe. The only thing we did different from your plans was to add a 1/8" sheet of plastic under the tack box area, the area the two milk crates sit and under the bottom drawer. You will see them in the photos. I thought that the plastic tack box and plastic milk crates would slide in and out smoother with plastic under them and it will also keep the wood from getting soiled. We also put parafin on the bottom of the two wooden drawers on the right side so the drawers slide in and out easier. Enjoy, DavidNOTE: Elite Tack Design replaced David's burned plans for FREE! |
Mr. Jeff Walker, from Colchester, VT. built this Total Tack Trunk for his daughter Nichole.
He says that "all in all it was a great design, and well worth the cost of the plans and was made
easier with the detail of the designs overall. I did however decide to re-enforce the base of the
trunk by adding two extra cross members on the bottom with and extra layer of plywood,
feeling that the initial base was not strong enough."
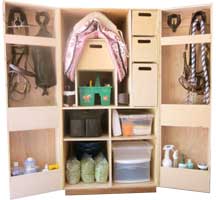 |
Hi there - thought I'd pass along the photos of my finally finished tack armoire! I made the following slight modifications: built both doors with the bridle hooks as opposed to polo wrap pockets, made the bottom two cubby holes large enough to fit a water bucket, lined the four cubby holes with a thin sheet of acrylic, and had a latch put on the outside bottom to help keep it closed. The outside was stained and sealed. I love it! - Lisa Schuetz |
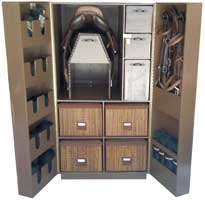 |
Hi Bill: With patience and double checking (and sometimes triple checking) everything, my tack armoire is complete. I loved your easy to follow directions and thank you for the email you provided on answers to my questions. I did do a couple changes. I put handles on the drawers and saddle house door. I also covered the saddle house with padding and then black vinyl and attached with hammered brass upholstery tacks. One of the drawers has a hasp lock on for medication, needles, syringes. I hung a blanket rack on one side. I also put a latch on the inside of one door to close and latch separately and a combination bolt on the front. Thank you again!!! - Sarah Dowling |
Hi Bill: When we pulled up to the stable at my daughter's college, a gentleman
came out to help unloadthe tack box off our truck and said in amazement, "Now that's a tack box!"
Everyone else came over and was commenting on how awesome it is. We kept hearing comments,
that "I have never seen such a great tack box.". Several people took out their cell phones and took
pictures of it. It was quite the show stopper. My daughter chose the color robin's egg blue as she
loves the jewelry store Tiffany. My husband and I were very proud to give our daughter such a gift.
Sincerely, Paige Ellwanger - Richmond, VA
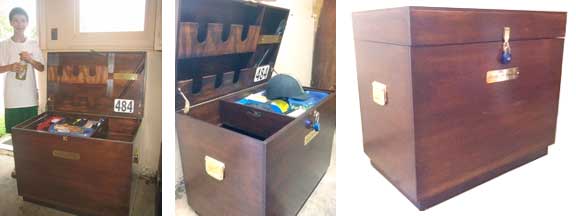
Hi: I am 13 years old, and love wood working. I built this trunk last summer for my sister and it
came out great. Here are some pictures of the trunk that I built using your Basic Tack Trunk plans.
Thought you might like to see them. Thanks, Matt McDermott

Here is a picture of our tack boxes. We modified the design slightly by making
the tack box a little wider. As well, handles were added and a strength bar
added at the handle locations so it strengthened the box when it gets lifted.
We are very happy with the outcome! Thank you for the plans! Darla Mitchell

Hi Bill: "I built this Basic Tack Trunk using plywood and hard maple. Before I finished it,
I took the top panel to a laser engraver and he added the horse and my daughter's name.
I went to a specialty hardware store and found the pewter horse heads which I installed for lifting handles.
It was a fun project and my daughter just loves it." - Joe McMahon

Dear Bill: The plans were great, everything went together perfectly.
My grand daughter Lilly made a pad for the top and did the color choice, we had fun with it.
Thanks, Bill Lilley
Chelsea's Tack Trunk Proposal
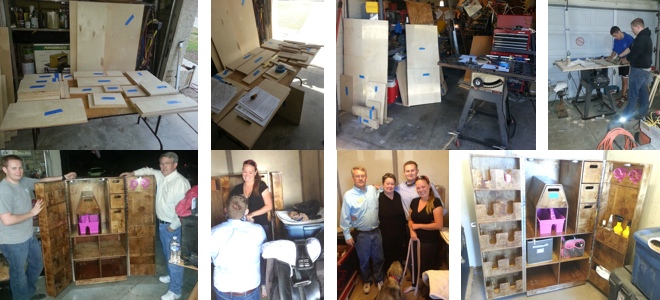
Mr. Tschorn: Thanks for putting together these plans - I built the cabinet during my time off over the
course of a few weeks and used it as a part of the proposal to my new fiancee. She loved the
cabinet, although momentarily forgot about it when the ring came out. I took a few photos of the
during and after. I had a lot of help from brothers George, Alex, mom & dad Ted and Diane and
my friend Kyle. Thanks again - I think the Go & Show Caddy will be the next project we will
attempt after the dust settles a bit! - Bill Harden

Hi Bill: Steve from Milton, Ontario... Got your plans earlier this year and finally got this done
in time for graduation... Had a lot of fun building it and really like your design...
My saddle roof hits against the rear bridle bracket but I am sure that was my fault...
thanks again for the plans... They were well worth the price. - Have a great summer - Steve Gallant
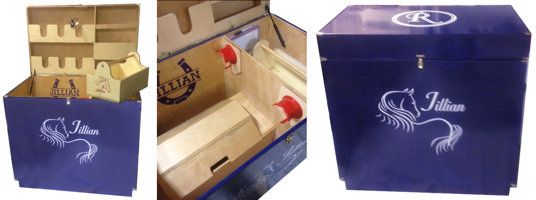
Hi Bill: I built this for my grandaughter from your plans. Thought you might like to see the pics.
Greg Socks
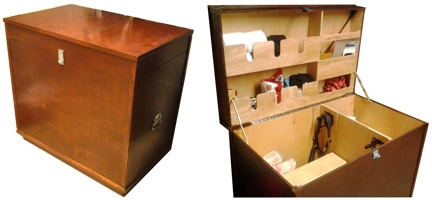
Hello Bill: So I finished the Basic Tack Plus trunk just in time for Christmas,
putting the final coats of polyurethane on Christmas morning. You'll see I added
corner molding to cover the exposed edges of the plywood as wall as some "stop" molding
around the edges which really dressed it up. We are waiting for the name plate to attach to the front.
I enjoyed building it and my daughter loves it. I've never seen her so excited. Now I know why
these trunks are so damn expensive to purchase, they're even more expensive to build if you count man hours!
We finished it with a brown stain and many coats of poly leaving the inside natural colored with only 1 coat of poly.
I may have to order plans for the Go and Show Caddy because this trunk is a monster! I'd have to have a trailer
for the horse and a trailer for the trunk to take it to shows. - Sincerely Scott Stephenson
Elite Tack Design would like to thank Scott for pointing out a "Callout" error in Basic Tack Plus manual.
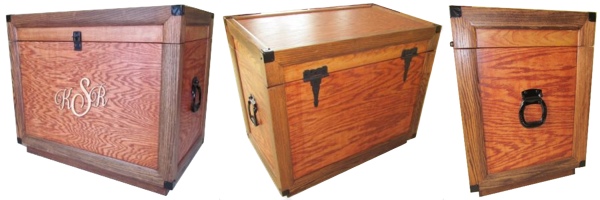
Dear Elite Tack Design Team: I built this Basic Tack Trunk for my daughter's 14th birthday and thanks to
your very detailed and complete instructions, it turned out great (even though I am not really a "wood wiz").
Overall your plans where very complete and easy to understand. I will definitely recommend you to others
that are thinking about building a trunk. I made the handles from the last shoes of my daughter's first horse
before he retired. Adds a personal touch. - Best regards: Alex Schmidt - West Bend, WI
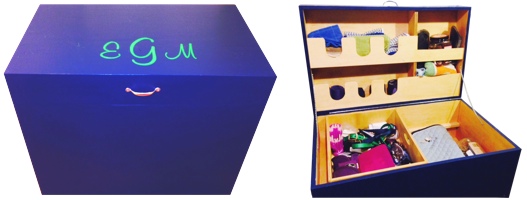
Hi Bill: My husband and my 11 year old daughter built your Basic Tack Trunk.
They added casters on one end so it's easily move around the tack room.
They had such a good time! Thank you for super good, easy to follow plans. We love it! - Kristie Gill
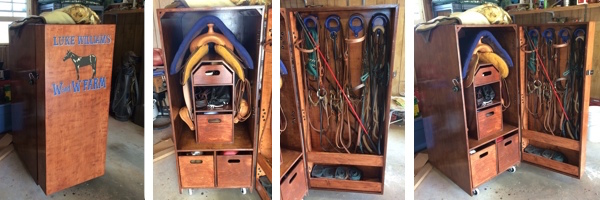
Hi Bill: I will be attending Martin Community College Equine program, and was in need of a stand up tack trunk.
The instructors recommended your designs and once I saw them I knew that's what I wanted!
I am more than satisfied with the results! - Western Tack Cabinet built by Luke Williams
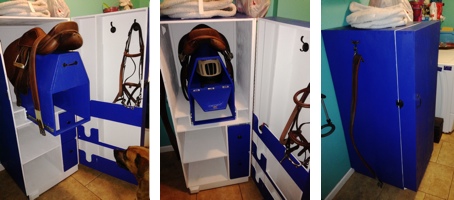
Hi Bill: It took longer than expected, but my wife's 11 year anniversary gift is complete.
She really loves it! I added the pull out saddle rack and finished drawer pulls and hooks to the original design.
I am pleased. - Thanks Steve Meyer
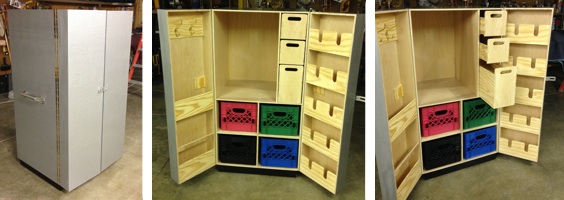
Hello: I purchased your Armoire Tack Cabinet plan and built it without the Saddle House for my
grandkids who raise and show cattle. After seeing them struggle to keep all their stuff organized at the shows,
I decided to build them something for Christmas. Initially I was intending on designing a cabinet or chest for them,
until I found your website. You saved me a ton of time! I was very pleased with the plans and found it very easy to build.
I used birch veneered plywood, and intended to paint the exterior green for their Irish heritage, until my daughter threw me
a curveball and asked me to do it in silver. I racked my brain trying to figure out how to do silver without having to spray it.
I found a Benjamin Moore Molten Metal paint in silver that worked great using a roller. A bit pricey at almost $30 a quart
(needed two) but well worth it. It has a hammered look and is very glossy so it should clean up easily in the barn.
Looking forward to building a couple more of your designs in the future. - Regards. Gary Eichhorst

Hi Bill: I asked my boyfriends dad, Frank O'Neill if he could build this box for me. He's a construction worker,
so he has built lots of houses and things but never something like this, but he did a great job and
I absolutely love it! The whole idea was great! - Alexis Vega

Hello Bill: Your plans were very helpful to this novice woodworker! My wife just got back into dressage after
25 years and asked me to build her a trunk. I did a fair amount of research online and your plans were detailed and clear.
I like the light weight of 1/2" ply and used Birch for the face and Poplar/Pine for the trim. She doesn't need all the wrap bins,
so I made the lid a little larger and strung bungee cord to hold in her helmets and some extra pads.
She also wants to see what's in the bottom of the trunk so instead of hatch I used a couple removable dowels to hold her caddy.
I had a local sign maker route her initials from an aluminum substrate (Dibond) and used VHB tape to adhere it.
Thanks for the right direction! - Michael Roccaforte
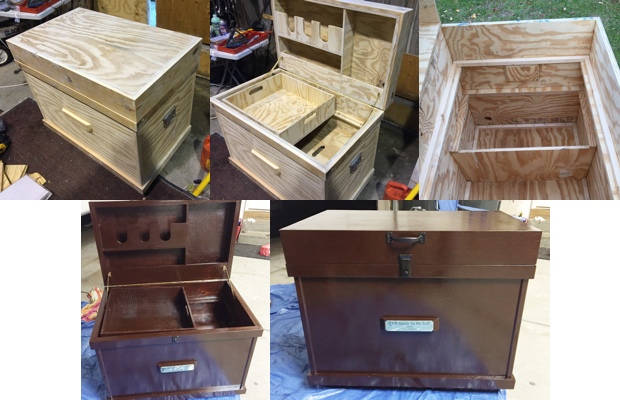
Hi Bill: I just finished up the Basic Tack Trunk and have attached pictures for you review and use.
Thank you and Merry Christmas! - Robert Campbell

Hi Bill: I recently completed the Armoire Tack Cabinet.
The doors are beaded vertical grain Douglas Fir with a clear polyurethane finish.
I made the trunk for my daughter and she helped with cutting out all the pieces
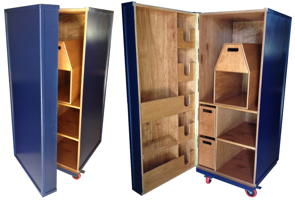
while she was home from college on break. She picked out the dark blue color for the exterior.
I attached the continuous hinges to the edge of the doors rather than the face of the cabinet,
so that just the barrel of the hinge shows and not the flaps and fasteners.
This was difficult and took a couple of tries to get it all square, but worthwhile I think.
Thanks - Steve Hart
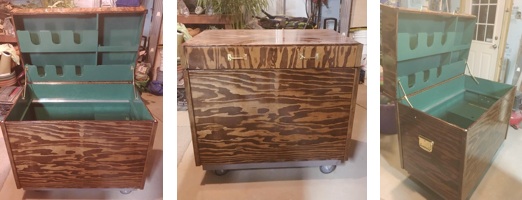
Hello Bill: Thanks for the plans. We enjoyed building it for my daughter,
found it rather challenging at times! I can't take much credit,
my dad built most of it as soon as the plans arrived, truth be told.
The only modifications we made was too put on 4 inch caster wheels and we
added an aluminum track for the drawer to slide on, also we bolted the supports that hold up the lid.
Dave Lawrence
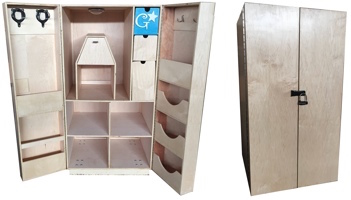
Hi Bill: I meant to send you these photos a few months back.
I finished the Armoire Tack Cabinet for my daughter and she is loving the space for all her tack and supplies!!
I used maple for the build and have 5-6 coats of clear on for all that barn dust protection.
Thanks for the wonderful instruction package and prompt service when I needed it.
Cheers, Kip Clancy - Calgary, Alberta.
Elite Tack Design would like to thank Kip for bringing to our attention a Dimensional Typo in our plans.
I can't tell you how many people have seen that page and have not caught that error. Kudo's to Kip.

Hi Bill: I used furniture-grade maple plywood with black walnut trim. Maple strips across back
where it will sit against the wall. Three coats of catalyzed varnish. I used inserts and bolts to hold wheels on;
not enough clearance for nuts and ends of bolts sticking out for wheels to swivel. First time
I have run into this problem. Top stays are for boat hatch covers from West Marine. Amazingly study,
safe and there were $20 apiece. I used a piece of 3/4-inch plywood for the base instead of 1/2-inch.
Covered the saddle roof with plastic laminate. Assembly was with nails, staples, 23mm and 18mm pins
(staples and pins are used in place of clamping) along with Titebond II glue.
I use to make furniture and now have access to a cabinet shop with a sliding table saw so cutting up
the plywood was a 20-minute task. Made it for a very good friend to give to his daughter for her birthday.
Have to make another for the other daughter's birthday in August. This one will be made with
cherry veneered plywood with ash or curly maple trim.
Your plans were nice, detailed. I can see how they are made for someone without significant woodworking skills
so they will be successful in machining and assembling. Took me about 40-hours to make. - Bub
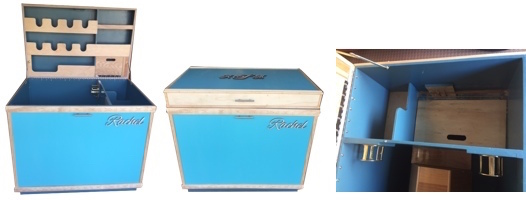
Hi Bill: Thought you would like to see my version of your Western Tack Plus design.
It was built for my granddaughter Rachel. The plans were extremely well done.
Absolutely no errors in plans. I learned a lot of patience while building,
which I don't normally have. - Rich Koenders
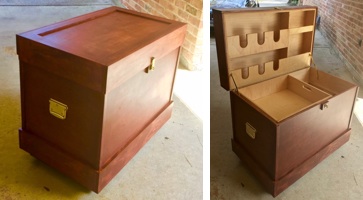
Bill: I wanted to thank you for the design. I used maple plywood and solids. Very happy with the result.
Plans were very easy to follow. Only hand tools and small table saw were used.
Most valuable tool was a rip jig that I made to help with making perfect square panels.
I will be starting a new project soon! Best Regards - Don Cammarata

Hello Bill: I recently purchased and built your "TOTAL TACK TRUNK" and could not be more happy
with the layout and ease of the build. The trunk came out really nice and my daughter is the envy
of the whole entire barn. She has room for pretty much everything she uses. I used 1/2" cabinet grade
birch plywood and only upgraded the bottom with 3/4" plywood. There is a light stain and spar varnish
on the outside and I added some corner molding to hide the plywood edges.
I've added some pictures of the build for you. Thanks for making a great set of plans available!
Thank you - Kev Firmin
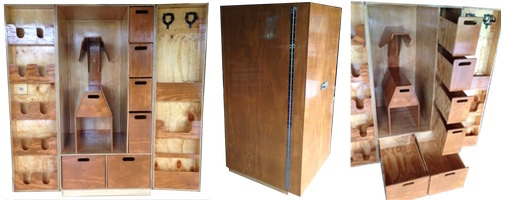
Hi Bill: We finally got it finished! Took a few weekends here and there.
Thought I would send some feedback. First, we are not woodworking craftsmen. Just dads, a son
and an 11 year old daughter that is excited beyond description to see a bunch of boards turn into a
beautiful tack cabinet that's hers. Since we are not craftsmen, I elected to have a lumber yard make the cuts
for the 3 cut sheets in the book. Pages 1 & 2, I bought AC quality Arauca plywood. Page 3, I bought
CDX quality yellow pine. We were glad we had the lumber yard make the cuts, they were spot on.
We read, reread and read again the instructions front to back. I ended up installing parting bead
under the 50/50 drawers. It wasn't in the instructions but it helped line them up.
Deck stain on the faces, saddle rack, saddle house, drawer fronts and exterior of the cabinet.
3 coats of Spar Urethane over the entire project and an old hasp we found in the garage.
The Brooks family
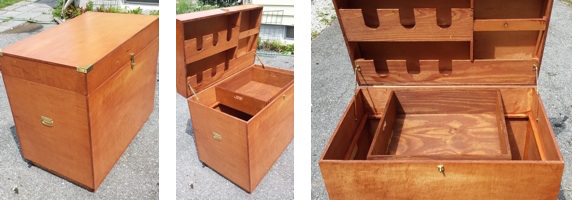
Hi Bill: Well after many fits and starts I finally got it done.
As previously discussed, I did not make the separate compartment on the inside.
Dan Albrecht - South Burlington Vermont
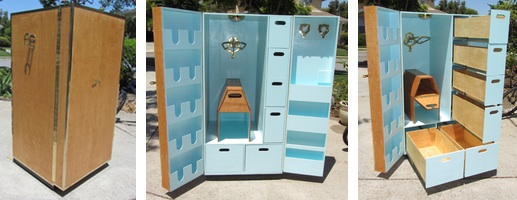
Dear Bill: Thanks for sending the Basic Tack Plus plans quickly. I attach photos of a Deluxe Armoire Cabinet
my daughter and I built 5 years ago from your plans that she still uses every day. The only big changes from
your design were to add an extra plywood base and to trim the drawer width slightly to allow the use of
full-extension drawer slides. If I had to do it all over again, I'd skip the skirt around the caster wheels.
These served only to make a very cozy rat breeding area under the locker and to make it difficult to roll around.
- Best Bruce

Hi there! Just wanted to say thank you! My husband and I took on this project for our daughter.
We consider ourselves pretty handy and found your instructions to be spot on and very easy to follow!
I measure, my husband cuts, we both assemble and I stain and finish. My husband and I also
took it a step farther and added some trim to the exterior. We are so proud of the final product.
Thanks again! - Darielle and Mark Masut

Mr. Tschorn: My wife purchased plans for your Basic Tack Trunk. They were very easy to follow instructions.
I wanted to share my final product. I did make some modifications on the inside Lid, my wife requested a small
medicine cabinet. So hence the alteration to the plans. If you look closely there is a hasp securing that small door.
The trim is actually aluminum. I used a combination of 1/8" 90 degree angle pieces and flat pieces.
Everything had to be perfectly square for this to work. Secondly it is secured with gorilla glue epoxy so no nails!
Thanks again! - John Lawrence
Elite Tack Design thinks John did a great job, nice metal trim work and
what we like to see our customers doing, modifying the original design for the rider desires.

Hi Bill: Well it took some time and some help when things didn't go as planned, but I've finished the
tack trunk for my daughter. Actually the only major issue that I had was when I went to put the lid on the box,
I found out that the box wasn't square. Fortunately, I had a friend who used to build cabinets come take
a look at it, and he took it back to his place and he added the band around the top of the box
(that was not part of the original plans, but we rather like it!).
Outside of that, I was able to follow the plans pretty much as written. As you can see,
I didn't end up using the lid supports, opting for chain to keep the lid from going too far back.
We added blocks and lag screws to hold the casters on, instead of using carriage bolts.
The monograms are decals that were done by a friend of mine.
It was a fun project and thankfully the trunk won't be too big for her to take to college! Thanks - Paul Burtner
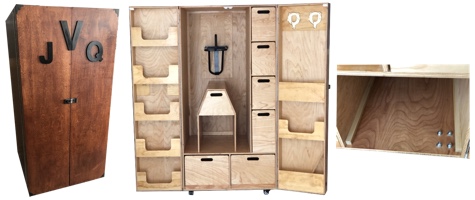
Hi Bill: DAC now finished and photos attached, it was the basic cabinet, my daughter loves it.
I am a firm believer in the wisdom of the crowd, so here are my contributions.
(1) I added plastic slide tape to the drawer rails, makes a huge difference.
(2) Added glue strips (3/4 x 3/4) to the drawers and certain portions of the cabinet for increased strength,
did not trust the end grain bonding of the Titebond III.
(3) Added magnetic catches for the doors, mine didn't stay closed, well may be due to sloping floor.
(4) I did not use the lower skirt around the wheels, my cabinet will basically stay in the same spot,
so it would become a rodent metropolis, probably not a problem for cabinets that are back and forth to shows.
(5) Added glue strips to serve as rails for the bottom (50/50) drawers, otherwise they would be scraping
on the hex nuts or carriage bolts.
(6) Added metal corner protectors to the corners, hard to shove this cabinet around without an occasional bump.
Thanks much for your help and support, Be Well - GEQ
GEQ was kind enough to pointed out some typo/errors in the Deluxe Armoire Cabinet (DAC)
construction manual, for which Elite Tack Design is thankful for.
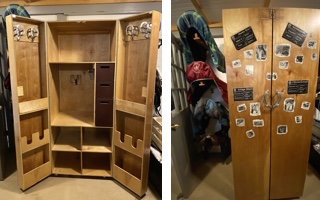
Hi Bill: It's finished ! I would have never dreamed that I could do something like this.
Thanks to your easy to follow instructions, I did my very first woodworking project.
I modified the plan a bit - I made it higher (72") and added some space for saddle pads,
and I designed the doors to hold bridles on both sides. Instead of a hasp lock,
I added magnets to keep the doors closed ( luckily I don't have to lock the armoire at our barn )
and I added a horse shoe as a handle ( actually It is my horse's horse shoe ).
I am so excited to have my tack organized in this beautiful tack cabinet !
So - thank you so much for all your support during the process - what an adventure. - Best Kerstin
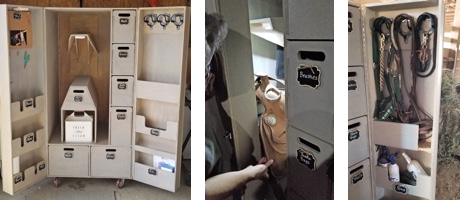
Hi Bill: I ordered the Deluxe Armoire designs a while back.
I love the design. I had my builder modify it slightly, removing some shelves from the left door,
adding battery operated lights, larger casters and removing the bottom skirt.
Lovely box....until I put my daily western saddle in it. The doors would not close.
This is a normal 16.5" seat western saddle. After a bit of back and forth I realized the skirts were
hitting the bridle pocket on the right door. I removed part of the pocket and the door closed fine.
I'm attaching my images including where I cut the pocket to accommodate the saddle.
It's a lovely box just wasn't expecting this rather large hiccup.
I'm just suggesting that you add a notice or some kind of language to your website that allows the person
to be forewarned that they need to measure their western saddle to ensure that it will fit
before purchasing your plan. - Thank you Regina Baker
Elite Tack Design thanks Regina for bring up the issue of her Western Saddle not fitting
We will add a" Riders Please Note" to all Trunk/Cabinet web pages addressing Saddle Sizes.

Good morning Elite Tack Design: My dad and I recently finished the Basic Tack Plus trunk and
I absolutely loved it. We had such a good time building it knowing that it's something I can use for
years to come. We made a few changes to the inside of the lid to fit my needs better and added trim,
but otherwise the plans were great! Thanks so much! Best - Katie and Mike Richards

Mr Tschorn: Here are some pictures of the cabinet I built this summer using your design.
The plans were very helpful . Thank you for making them available.
Best - Rahoul Ghose
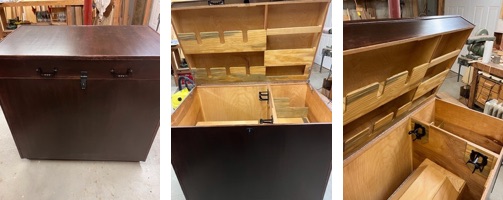
Hello Elite: I have finished the Basic Tack Plus trunk. I wrote to you about the order of construction
back in October and I stick with my premise that putting the back on last is the way to go.
I was able to finish much of the inside and attach the interior piano hinges easily without the back on.
I covered up all of the exposed plywood edges and nail heads with oak which will prevent splintering.
I used a pneumatic pin nailer, not finishing nails.
You have an excellent design and my client was very happy with the result.
Thanks Dave
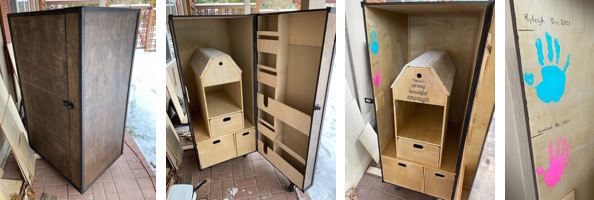
Hi Bill: I finished this Western Tack Cabinet last spring but realized I should share the results
with you and the world. Awesome design and thanks for it! - Nate Winchester
Elite Tack Design - Nice job Nate, I see you used larger Caster with no Base Legs and
put on an Extra Wheel on the Door that seems like a good Idea.
I like the piece of rug on the Saddle House and love you daughters hand prints inside!
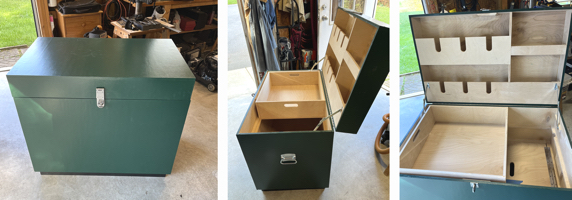
Hi Bill: I just finished this Basic Tack Trunk for my niece's daughter and everything went well.
Very clear and accurate plans made this easy. Found a minor typo on the plans, page BT-V.
Thank You - Ken Litaker, Marriottsville, MD
Elite Tack Design - Very nice job on the trunk Ken, thanks for spotting the Typo on our plans.
These plans are over 20 years old and have been purchased & read over 825 times.
So we give Kudo's to Keb for the fine.
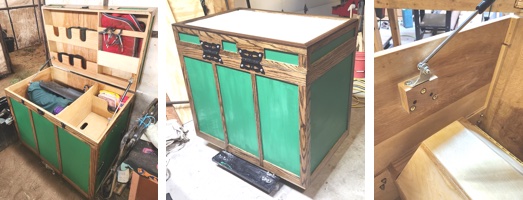
Hi Bill: The Basic Tack Plus design plans where very detailed and very solid build
while still being light weight. The oak on the trunk is from bunk beds my
great grandfather made for me 40 yrs ago. My daughter loves it. - Zachary Sprimont

Hi Bill: Thanks for your designs! The plans were helpful and simple to follow.
My wife, Kirsten, treasures the box and finds it useful. Now my girls and sister-in-law want one. - Ted
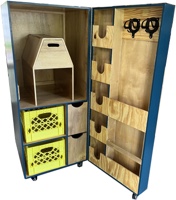
Hi Bill: Mission accomplished. My husband has finished the Total Tack Cabinet just in time for our
granddaughter's 16th birthday. The plan is that it will go to college with her and her pony.
We were inspired by another customer's photo and added the wheel to the door and as
several people did, we left off the skirting around the bottom (although it is a really pretty touch).
Thank you so much for your assistance. - The Barton's
Elite Tack Design thanks our customers for sharing there emails and pictures.

came out to help unloadthe tack box off our truck and said in amazement, "Now that's a tack box!"
Everyone else came over and was commenting on how awesome it is. We kept hearing comments,
that "I have never seen such a great tack box.". Several people took out their cell phones and took
pictures of it. It was quite the show stopper. My daughter chose the color robin's egg blue as she
loves the jewelry store Tiffany. My husband and I were very proud to give our daughter such a gift.
Sincerely, Paige Ellwanger - Richmond, VA

Hi: I am 13 years old, and love wood working. I built this trunk last summer for my sister and it
came out great. Here are some pictures of the trunk that I built using your Basic Tack Trunk plans.
Thought you might like to see them. Thanks, Matt McDermott
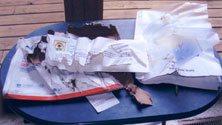 Hi Bill: Though maybe you would like to see a picture of how your plans arrived. This has never happened before and ETD sent Wes a new set of plans for FREE. |
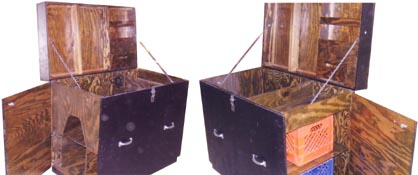 Hi Bill: I used your design with a few changes. I made it 3" longer in the saddle area. I used u-bolts & pins for the side doors, latches and chain to hold the lid up. Thanks for the 2nd set of plans. - Wes Schmidt |

Here is a picture of our tack boxes. We modified the design slightly by making
the tack box a little wider. As well, handles were added and a strength bar
added at the handle locations so it strengthened the box when it gets lifted.
We are very happy with the outcome! Thank you for the plans! Darla Mitchell
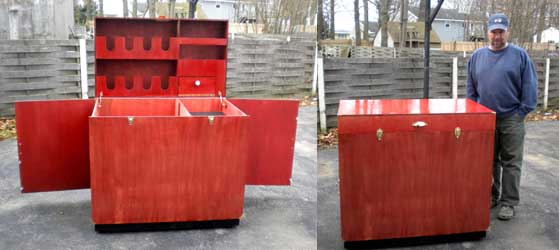
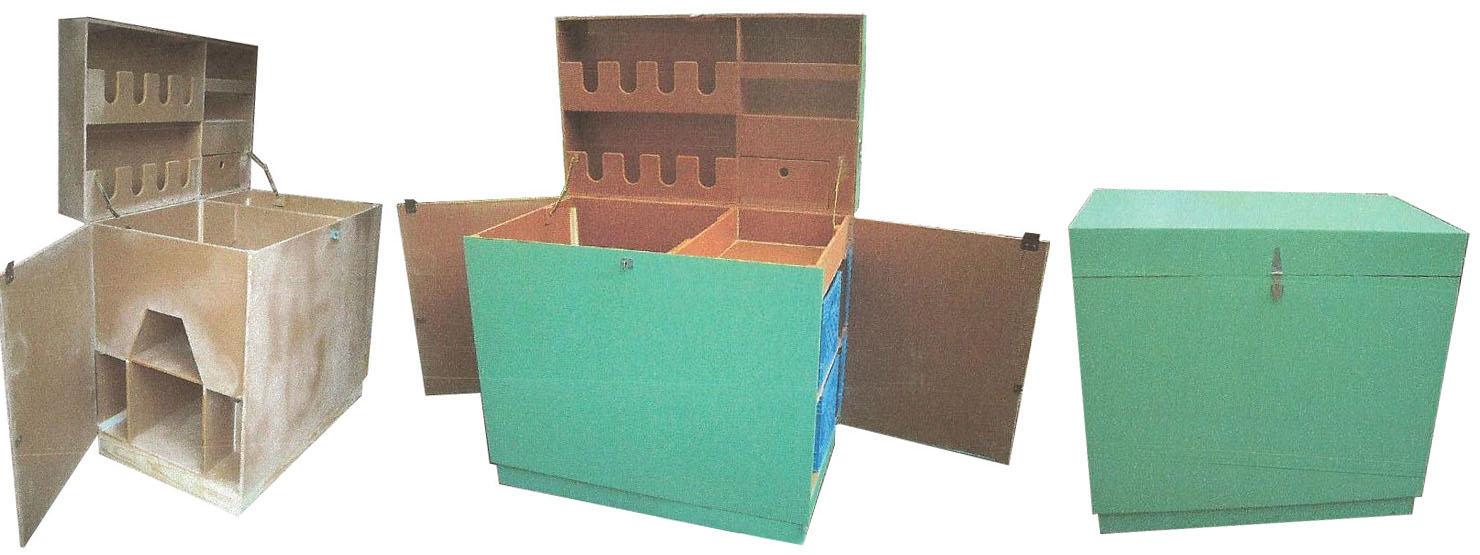
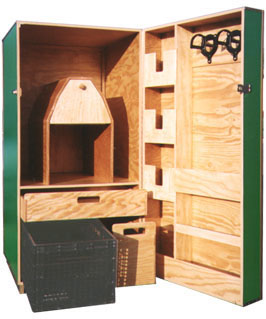 This early Total Tack Cabinet was built on consignment. Made with our "Saddle House" design, with 2 draws and a plastic crate for storage. Laminated in green Formica. |
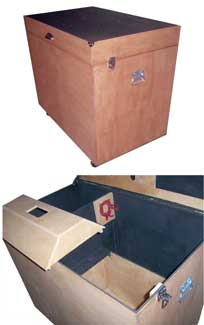
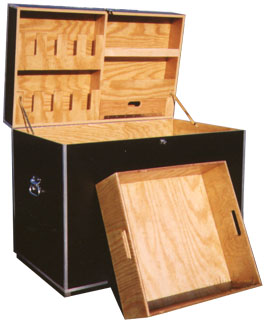 This early Basic Tack Trunk was built on consignment. Made with a large sliding / take out draw and personal lid compartment door. Laminated in black Formica. |
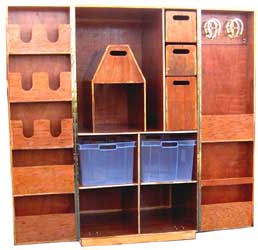
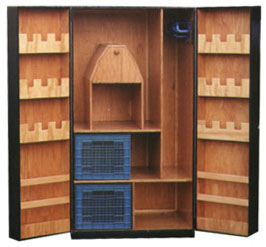 I built this Armoire Tack Cabinet for my wife, "Chris". It's 20 years in use and still strong as the day it was built. Painted black enamel and ¾" aluminum angle trim. |
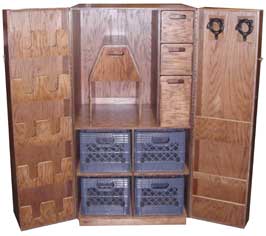 Armoire Tack Cabinet by Bill Owen for his daughter-in-law Trina.. |
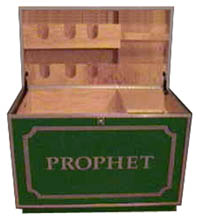 Basic Tack Trunk by Whit Prophet for her daughter Rebecca.. |
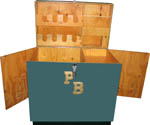 Total Tack Trunk by David Schircliff for Paige Buckwalter. |
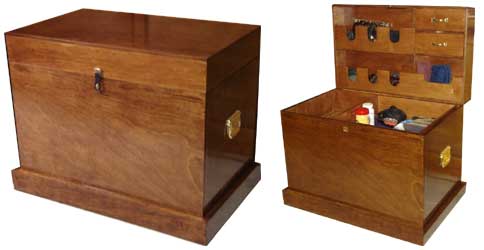 Ken Smith built this Basic Tack Trunk with few custom draws. |
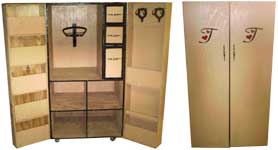 Thomas Lade and Tiffany Hart built this simplified version of the Armoire Tack Cabinet. |
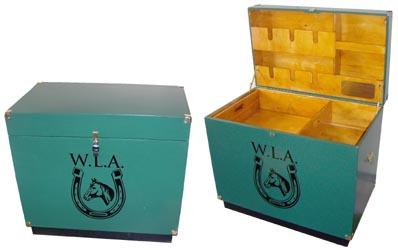 |
Hello Bill: I recently finished the "Basic Tack Box and today my wife & I delivered it to our daughter. She was so happy that she cried with joy. The building experience was very enjoyable. I am happy with the way it turned out and I compliment you on your excellent instructions which made the build very rewarding. Best regards, Dennis |
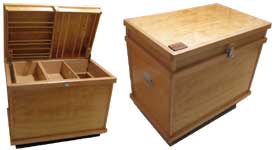 Basic Tack Trunk by Gerald J. Buchko
|
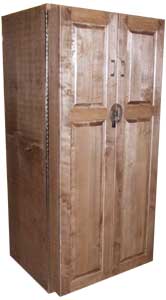 |
This version of our Armoire Tack Cabinet was built by grandpap Richard for his young equestrain granddaughter. |
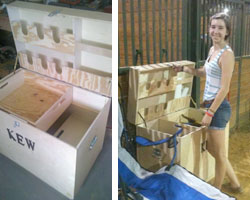 |
Hi Bill: I built this Basic Tack Trunk last month for my son's girl friend, Kayla. She is absolutely delighted with it. Your directions were really great. I laid out the plywood pieces so I could cut across the sheet without stopping, and then trim pieces appropriately. You might suggest to your builders who have always wanted to buy a nail gun system, that this is the project to act on that urge. Thanks again for the great design. Cheers, Van Dittmer |

Hi Bill: "I built this Basic Tack Trunk using plywood and hard maple. Before I finished it,
I took the top panel to a laser engraver and he added the horse and my daughter's name.
I went to a specialty hardware store and found the pewter horse heads which I installed for lifting handles.
It was a fun project and my daughter just loves it." - Joe McMahon
 |
Hi: The trunk is all finished ready for my winter season! We made a few changes to the original plans to make sure it was going to be 100% usable for me, but over all your plans were fantastically easy and simple to follow (even with constant conversion calculations lol ). Many thanks again for all your help. Best regards - Joely Walker (Conversions need because of UK metric system) |
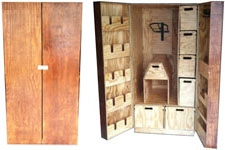 |
Hi Bill: I finished the cabinet. The inside in done with Polyshades Classic Oak and the outside is Polyshades American Chestnut. Thanks much, my daughter loves it. - Darwin Caverly |

Dear Bill: The plans were great, everything went together perfectly.
My grand daughter Lilly made a pad for the top and did the color choice, we had fun with it.
Thanks, Bill Lilley

Mr. Tschorn: Thanks for putting together these plans - I built the cabinet during my time off over the
cabinet, although momentarily forgot about it when the ring came out. I took a few photos of the
during and after. I had a lot of help from brothers George, Alex, mom & dad Ted and Diane and
my friend Kyle. Thanks again - I think the Go & Show Caddy will be the next project we will
attempt after the dust settles a bit! - Bill Harden

Hi Bill: Steve from Milton, Ontario... Got your plans earlier this year and finally got this done
in time for graduation... Had a lot of fun building it and really like your design...
My saddle roof hits against the rear bridle bracket but I am sure that was my fault...
thanks again for the plans... They were well worth the price. - Have a great summer - Steve Gallant
 |
Hi Bill: I ordered plans from your site a few months ago and gave them to my dad to build me the tack cabinet! He just finished it for me as a birthday present, and I could not be any happier! I just wanted to share pictures of the finished product! My dad is a contractor and specializes in kitchens, crown molding, and cabinets. He thought your plans were great! I love the way the tack cabinet came out, and I cannot wait to start using it! I plan on ordering a monogrammed vinyl decal to put on the door. - Erica Ryan |

Hi Bill: I built this for my grandaughter from your plans. Thought you might like to see the pics.
Greg Socks

Hello Bill: So I finished the Basic Tack Plus trunk just in time for Christmas,
putting the final coats of polyurethane on Christmas morning. You'll see I added
corner molding to cover the exposed edges of the plywood as wall as some "stop" molding
around the edges which really dressed it up. We are waiting for the name plate to attach to the front.
I enjoyed building it and my daughter loves it. I've never seen her so excited. Now I know why
these trunks are so damn expensive to purchase, they're even more expensive to build if you count man hours!
We finished it with a brown stain and many coats of poly leaving the inside natural colored with only 1 coat of poly.
I may have to order plans for the Go and Show Caddy because this trunk is a monster! I'd have to have a trailer
for the horse and a trailer for the trunk to take it to shows. - Sincerely Scott Stephenson
Elite Tack Design would like to thank Scott for pointing out a "Callout" error in Basic Tack Plus manual.
 |
Hi Bill: I made this trunk for my 13 yr old daughter Cathryn. I thought the plans were excellent and it's the first time I've even taken on a project like this and actually had to buy some of the tools needed to complete the project. All the hints/tips were excellent and really made for a great experience. - Aaron Schacht |

Dear Elite Tack Design Team: I built this Basic Tack Trunk for my daughter's 14th birthday and thanks to
your very detailed and complete instructions, it turned out great (even though I am not really a "wood wiz").
Overall your plans where very complete and easy to understand. I will definitely recommend you to others
that are thinking about building a trunk. I made the handles from the last shoes of my daughter's first horse
before he retired. Adds a personal touch. - Best regards: Alex Schmidt - West Bend, WI

Hi Bill: My husband and my 11 year old daughter built your Basic Tack Trunk.
They added casters on one end so it's easily move around the tack room.
They had such a good time! Thank you for super good, easy to follow plans. We love it! - Kristie Gill

Hi Bill: I will be attending Martin Community College Equine program, and was in need of a stand up tack trunk.
The instructors recommended your designs and once I saw them I knew that's what I wanted!
I am more than satisfied with the results! - Western Tack Cabinet built by Luke Williams

Hi Bill: It took longer than expected, but my wife's 11 year anniversary gift is complete.
She really loves it! I added the pull out saddle rack and finished drawer pulls and hooks to the original design.
I am pleased. - Thanks Steve Meyer

Hello: I purchased your Armoire Tack Cabinet plan and built it without the Saddle House for my
grandkids who raise and show cattle. After seeing them struggle to keep all their stuff organized at the shows,
I decided to build them something for Christmas. Initially I was intending on designing a cabinet or chest for them,
until I found your website. You saved me a ton of time! I was very pleased with the plans and found it very easy to build.
I used birch veneered plywood, and intended to paint the exterior green for their Irish heritage, until my daughter threw me
a curveball and asked me to do it in silver. I racked my brain trying to figure out how to do silver without having to spray it.
I found a Benjamin Moore Molten Metal paint in silver that worked great using a roller. A bit pricey at almost $30 a quart
(needed two) but well worth it. It has a hammered look and is very glossy so it should clean up easily in the barn.
Looking forward to building a couple more of your designs in the future. - Regards. Gary Eichhorst
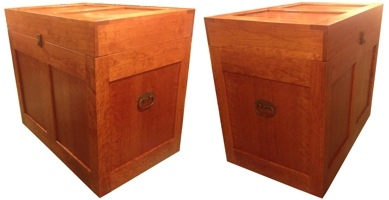 |
Bill: Thought you may like to see some pics of the almost finished Basic Tack Plus I am building as per your plans. Took it "uptown" a little by making it out of cherry and using hand forged fittings. Should be a great birthday gift for my Daughter-in-law. Thanks for a great design. Best regards - Don Rasmussen |

Hi Bill: I asked my boyfriends dad, Frank O'Neill if he could build this box for me. He's a construction worker,
so he has built lots of houses and things but never something like this, but he did a great job and
I absolutely love it! The whole idea was great! - Alexis Vega

Hello Bill: Your plans were very helpful to this novice woodworker! My wife just got back into dressage after
25 years and asked me to build her a trunk. I did a fair amount of research online and your plans were detailed and clear.
I like the light weight of 1/2" ply and used Birch for the face and Poplar/Pine for the trim. She doesn't need all the wrap bins,
so I made the lid a little larger and strung bungee cord to hold in her helmets and some extra pads.
She also wants to see what's in the bottom of the trunk so instead of hatch I used a couple removable dowels to hold her caddy.
I had a local sign maker route her initials from an aluminum substrate (Dibond) and used VHB tape to adhere it.
Thanks for the right direction! - Michael Roccaforte
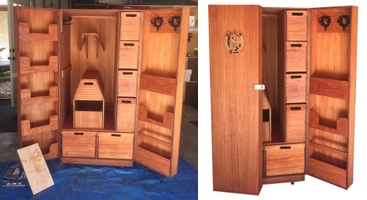 |
Hi Bill: I wanted to share the finished product My husband is not a carpenter, but your plans made it easy to build this Deluxe Armoire Cabinet. - Thanks Michelle Kelly |

Hi Bill: I just finished up the Basic Tack Trunk and have attached pictures for you review and use.
Thank you and Merry Christmas! - Robert Campbell

Hi Bill: I recently completed the Armoire Tack Cabinet.
The doors are beaded vertical grain Douglas Fir with a clear polyurethane finish.
I made the trunk for my daughter and she helped with cutting out all the pieces
while she was home from college on break. She picked out the dark blue color for the exterior.
I attached the continuous hinges to the edge of the doors rather than the face of the cabinet,
so that just the barrel of the hinge shows and not the flaps and fasteners.
This was difficult and took a couple of tries to get it all square, but worthwhile I think.
Thanks - Steve Hart

Hello Bill: Thanks for the plans. We enjoyed building it for my daughter,
found it rather challenging at times! I can't take much credit,
my dad built most of it as soon as the plans arrived, truth be told.
The only modifications we made was too put on 4 inch caster wheels and we
added an aluminum track for the drawer to slide on, also we bolted the supports that hold up the lid.
Dave Lawrence

Hi Bill: I meant to send you these photos a few months back.
I finished the Armoire Tack Cabinet for my daughter and she is loving the space for all her tack and supplies!!
I used maple for the build and have 5-6 coats of clear on for all that barn dust protection.
Thanks for the wonderful instruction package and prompt service when I needed it.
Cheers, Kip Clancy - Calgary, Alberta.
Elite Tack Design would like to thank Kip for bringing to our attention a Dimensional Typo in our plans.
I can't tell you how many people have seen that page and have not caught that error. Kudo's to Kip.

Hi Bill: I used furniture-grade maple plywood with black walnut trim. Maple strips across back
where it will sit against the wall. Three coats of catalyzed varnish. I used inserts and bolts to hold wheels on;
not enough clearance for nuts and ends of bolts sticking out for wheels to swivel. First time
I have run into this problem. Top stays are for boat hatch covers from West Marine. Amazingly study,
safe and there were $20 apiece. I used a piece of 3/4-inch plywood for the base instead of 1/2-inch.
Covered the saddle roof with plastic laminate. Assembly was with nails, staples, 23mm and 18mm pins
(staples and pins are used in place of clamping) along with Titebond II glue.
I use to make furniture and now have access to a cabinet shop with a sliding table saw so cutting up
the plywood was a 20-minute task. Made it for a very good friend to give to his daughter for her birthday.
Have to make another for the other daughter's birthday in August. This one will be made with
cherry veneered plywood with ash or curly maple trim.
Your plans were nice, detailed. I can see how they are made for someone without significant woodworking skills
so they will be successful in machining and assembling. Took me about 40-hours to make. - Bub

Hi Bill: Thought you would like to see my version of your Western Tack Plus design.
It was built for my granddaughter Rachel. The plans were extremely well done.
Absolutely no errors in plans. I learned a lot of patience while building,
which I don't normally have. - Rich Koenders
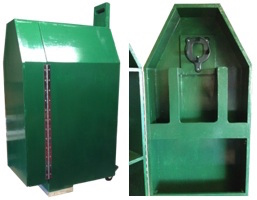 |
Hello Bill: Here is the finished product. Hunter green is the color. My granddaughter has a show jumping competition tomorrow. She is at a new stable now. As soon as they finish the tack room she can put it there. For now it's in my shop. I may tackle the large cabinet this year. Thanks for your assistance and plans. - Jack Bouchez |

Bill: I wanted to thank you for the design. I used maple plywood and solids. Very happy with the result.
Plans were very easy to follow. Only hand tools and small table saw were used.
Most valuable tool was a rip jig that I made to help with making perfect square panels.
I will be starting a new project soon! Best Regards - Don Cammarata

Hello Bill: I recently purchased and built your "TOTAL TACK TRUNK" and could not be more happy
with the layout and ease of the build. The trunk came out really nice and my daughter is the envy
of the whole entire barn. She has room for pretty much everything she uses. I used 1/2" cabinet grade
birch plywood and only upgraded the bottom with 3/4" plywood. There is a light stain and spar varnish
on the outside and I added some corner molding to hide the plywood edges.
I've added some pictures of the build for you. Thanks for making a great set of plans available!
Thank you - Kev Firmin

Hi Bill: We finally got it finished! Took a few weekends here and there.
Thought I would send some feedback. First, we are not woodworking craftsmen. Just dads, a son
and an 11 year old daughter that is excited beyond description to see a bunch of boards turn into a
beautiful tack cabinet that's hers. Since we are not craftsmen, I elected to have a lumber yard make the cuts
for the 3 cut sheets in the book. Pages 1 & 2, I bought AC quality Arauca plywood. Page 3, I bought
CDX quality yellow pine. We were glad we had the lumber yard make the cuts, they were spot on.
We read, reread and read again the instructions front to back. I ended up installing parting bead
under the 50/50 drawers. It wasn't in the instructions but it helped line them up.
Deck stain on the faces, saddle rack, saddle house, drawer fronts and exterior of the cabinet.
3 coats of Spar Urethane over the entire project and an old hasp we found in the garage.
The Brooks family

Hi Bill: Well after many fits and starts I finally got it done.
As previously discussed, I did not make the separate compartment on the inside.
Dan Albrecht - South Burlington Vermont

Dear Bill: Thanks for sending the Basic Tack Plus plans quickly. I attach photos of a Deluxe Armoire Cabinet
my daughter and I built 5 years ago from your plans that she still uses every day. The only big changes from
your design were to add an extra plywood base and to trim the drawer width slightly to allow the use of
full-extension drawer slides. If I had to do it all over again, I'd skip the skirt around the caster wheels.
These served only to make a very cozy rat breeding area under the locker and to make it difficult to roll around.
- Best Bruce

Hi there! Just wanted to say thank you! My husband and I took on this project for our daughter.
We consider ourselves pretty handy and found your instructions to be spot on and very easy to follow!
I measure, my husband cuts, we both assemble and I stain and finish. My husband and I also
took it a step farther and added some trim to the exterior. We are so proud of the final product.
Thanks again! - Darielle and Mark Masut
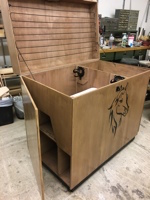 |
Dear Bill: I've been meaning to send you this photo.
I made this for my niece. Your plans were perfect!
Thank you so much! - Dawn Boger |

Mr. Tschorn: My wife purchased plans for your Basic Tack Trunk. They were very easy to follow instructions.
I wanted to share my final product. I did make some modifications on the inside Lid, my wife requested a small
medicine cabinet. So hence the alteration to the plans. If you look closely there is a hasp securing that small door.
The trim is actually aluminum. I used a combination of 1/8" 90 degree angle pieces and flat pieces.
Everything had to be perfectly square for this to work. Secondly it is secured with gorilla glue epoxy so no nails!
Thanks again! - John Lawrence
Elite Tack Design thinks John did a great job, nice metal trim work and
what we like to see our customers doing, modifying the original design for the rider desires.

Hi Bill: Well it took some time and some help when things didn't go as planned, but I've finished the
tack trunk for my daughter. Actually the only major issue that I had was when I went to put the lid on the box,
I found out that the box wasn't square. Fortunately, I had a friend who used to build cabinets come take
a look at it, and he took it back to his place and he added the band around the top of the box
(that was not part of the original plans, but we rather like it!).
Outside of that, I was able to follow the plans pretty much as written. As you can see,
I didn't end up using the lid supports, opting for chain to keep the lid from going too far back.
We added blocks and lag screws to hold the casters on, instead of using carriage bolts.
The monograms are decals that were done by a friend of mine.
It was a fun project and thankfully the trunk won't be too big for her to take to college! Thanks - Paul Burtner
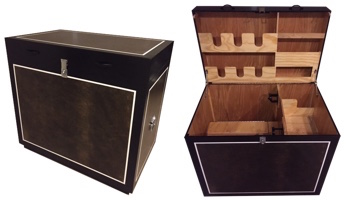 |
Hi Bill: Just finished this Basic Tack Plus for my daughter. Great design! I was very pleased with the plans and am happy with how it turned out. Thanks again for a great product. - Brett Blake |
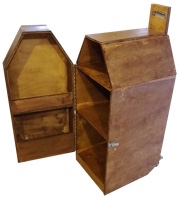 |
Hi Bill: I get the sense from other postings that you eagerly await these photos! Perhaps tracking people down at the end of the year and wondering what became of plan X. Well, here you go! I haven't spent much time behind a table saw since shop class but these plans made it easy to pick back up! There are a few cuts and joints I'd like back and I'd probably use less wood glue in some areas. For Father's Day I got a Table Saw and Nail Gun. My son is so excited and the wife is asking about the Armoire Cabinet! Thanks again for all the help along the way! - Best Tom |

Hi Bill: DAC now finished and photos attached, it was the basic cabinet, my daughter loves it.
I am a firm believer in the wisdom of the crowd, so here are my contributions.
(1) I added plastic slide tape to the drawer rails, makes a huge difference.
(2) Added glue strips (3/4 x 3/4) to the drawers and certain portions of the cabinet for increased strength,
did not trust the end grain bonding of the Titebond III.
(3) Added magnetic catches for the doors, mine didn't stay closed, well may be due to sloping floor.
(4) I did not use the lower skirt around the wheels, my cabinet will basically stay in the same spot,
so it would become a rodent metropolis, probably not a problem for cabinets that are back and forth to shows.
(5) Added glue strips to serve as rails for the bottom (50/50) drawers, otherwise they would be scraping
on the hex nuts or carriage bolts.
(6) Added metal corner protectors to the corners, hard to shove this cabinet around without an occasional bump.
Thanks much for your help and support, Be Well - GEQ
GEQ was kind enough to pointed out some typo/errors in the Deluxe Armoire Cabinet (DAC)
construction manual, for which Elite Tack Design is thankful for.

Hi Bill: It's finished ! I would have never dreamed that I could do something like this.
Thanks to your easy to follow instructions, I did my very first woodworking project.
I modified the plan a bit - I made it higher (72") and added some space for saddle pads,
and I designed the doors to hold bridles on both sides. Instead of a hasp lock,
I added magnets to keep the doors closed ( luckily I don't have to lock the armoire at our barn )
and I added a horse shoe as a handle ( actually It is my horse's horse shoe ).
I am so excited to have my tack organized in this beautiful tack cabinet !
So - thank you so much for all your support during the process - what an adventure. - Best Kerstin

Hi Bill: I ordered the Deluxe Armoire designs a while back.
I love the design. I had my builder modify it slightly, removing some shelves from the left door,
adding battery operated lights, larger casters and removing the bottom skirt.
Lovely box....until I put my daily western saddle in it. The doors would not close.
This is a normal 16.5" seat western saddle. After a bit of back and forth I realized the skirts were
hitting the bridle pocket on the right door. I removed part of the pocket and the door closed fine.
I'm attaching my images including where I cut the pocket to accommodate the saddle.
It's a lovely box just wasn't expecting this rather large hiccup.
I'm just suggesting that you add a notice or some kind of language to your website that allows the person
to be forewarned that they need to measure their western saddle to ensure that it will fit
before purchasing your plan. - Thank you Regina Baker
Elite Tack Design thanks Regina for bring up the issue of her Western Saddle not fitting
We will add a" Riders Please Note" to all Trunk/Cabinet web pages addressing Saddle Sizes.

Good morning Elite Tack Design: My dad and I recently finished the Basic Tack Plus trunk and
I absolutely loved it. We had such a good time building it knowing that it's something I can use for
years to come. We made a few changes to the inside of the lid to fit my needs better and added trim,
but otherwise the plans were great! Thanks so much! Best - Katie and Mike Richards

Mr Tschorn: Here are some pictures of the cabinet I built this summer using your design.
The plans were very helpful . Thank you for making them available.
Best - Rahoul Ghose

Hello Elite: I have finished the Basic Tack Plus trunk. I wrote to you about the order of construction
back in October and I stick with my premise that putting the back on last is the way to go.
I was able to finish much of the inside and attach the interior piano hinges easily without the back on.
I covered up all of the exposed plywood edges and nail heads with oak which will prevent splintering.
I used a pneumatic pin nailer, not finishing nails.
You have an excellent design and my client was very happy with the result.
Thanks Dave

Hi Bill: I finished this Western Tack Cabinet last spring but realized I should share the results
with you and the world. Awesome design and thanks for it! - Nate Winchester
Elite Tack Design - Nice job Nate, I see you used larger Caster with no Base Legs and
put on an Extra Wheel on the Door that seems like a good Idea.
I like the piece of rug on the Saddle House and love you daughters hand prints inside!

Hi Bill: I just finished this Basic Tack Trunk for my niece's daughter and everything went well.
Very clear and accurate plans made this easy. Found a minor typo on the plans, page BT-V.
Thank You - Ken Litaker, Marriottsville, MD
Elite Tack Design - Very nice job on the trunk Ken, thanks for spotting the Typo on our plans.
These plans are over 20 years old and have been purchased & read over 825 times.
So we give Kudo's to Keb for the fine.

Hi Bill: The Basic Tack Plus design plans where very detailed and very solid build
while still being light weight. The oak on the trunk is from bunk beds my
great grandfather made for me 40 yrs ago. My daughter loves it. - Zachary Sprimont

Hi Bill: Thanks for your designs! The plans were helpful and simple to follow.
My wife, Kirsten, treasures the box and finds it useful. Now my girls and sister-in-law want one. - Ted

Hi Bill: Mission accomplished. My husband has finished the Total Tack Cabinet just in time for our
granddaughter's 16th birthday. The plan is that it will go to college with her and her pony.
We were inspired by another customer's photo and added the wheel to the door and as
several people did, we left off the skirting around the bottom (although it is a really pretty touch).
Thank you so much for your assistance. - The Barton's
